Tested on:
Dynamics 365 CE with Field Service v 8.8.2.160, mobile project v 1.0.1322
The previous blog post I wrote was about moving attachments from Notes to SharePoint Online with Flow. My decision to use SharePoint caught the attention of some Azure fans, so I thought I’d explore Azure based storage as well. Azure Storage and all its different services isn’t directly my workload, but this seemed like a good opportunity to learn a tiny bit about Azure and what it has to offer. In this blog post I’m covering how move attachments from Notes to Azure Files and Azure Blobs. The point of this post isn’t to sell one service over the other. I’ll leave the decision of which service to use to you. To get started with the differences between Files and Blobs, be sure to check out this page by Microsoft.
Based on some quick tests and conversations on LinkedIn, there is more than one way of building a Flow that moves an attachment over to Azure. No surprise here really – the great thing about Flow is that it allows makers to use creativity in building Flows. As a result, I decided to build a single Flow that includes three different approaches to moving attachments from the Notes entity in D365 CE. One approach moves attachments to Azure Files, the second approach to Azure Blobs and the third to SharePoint Online.
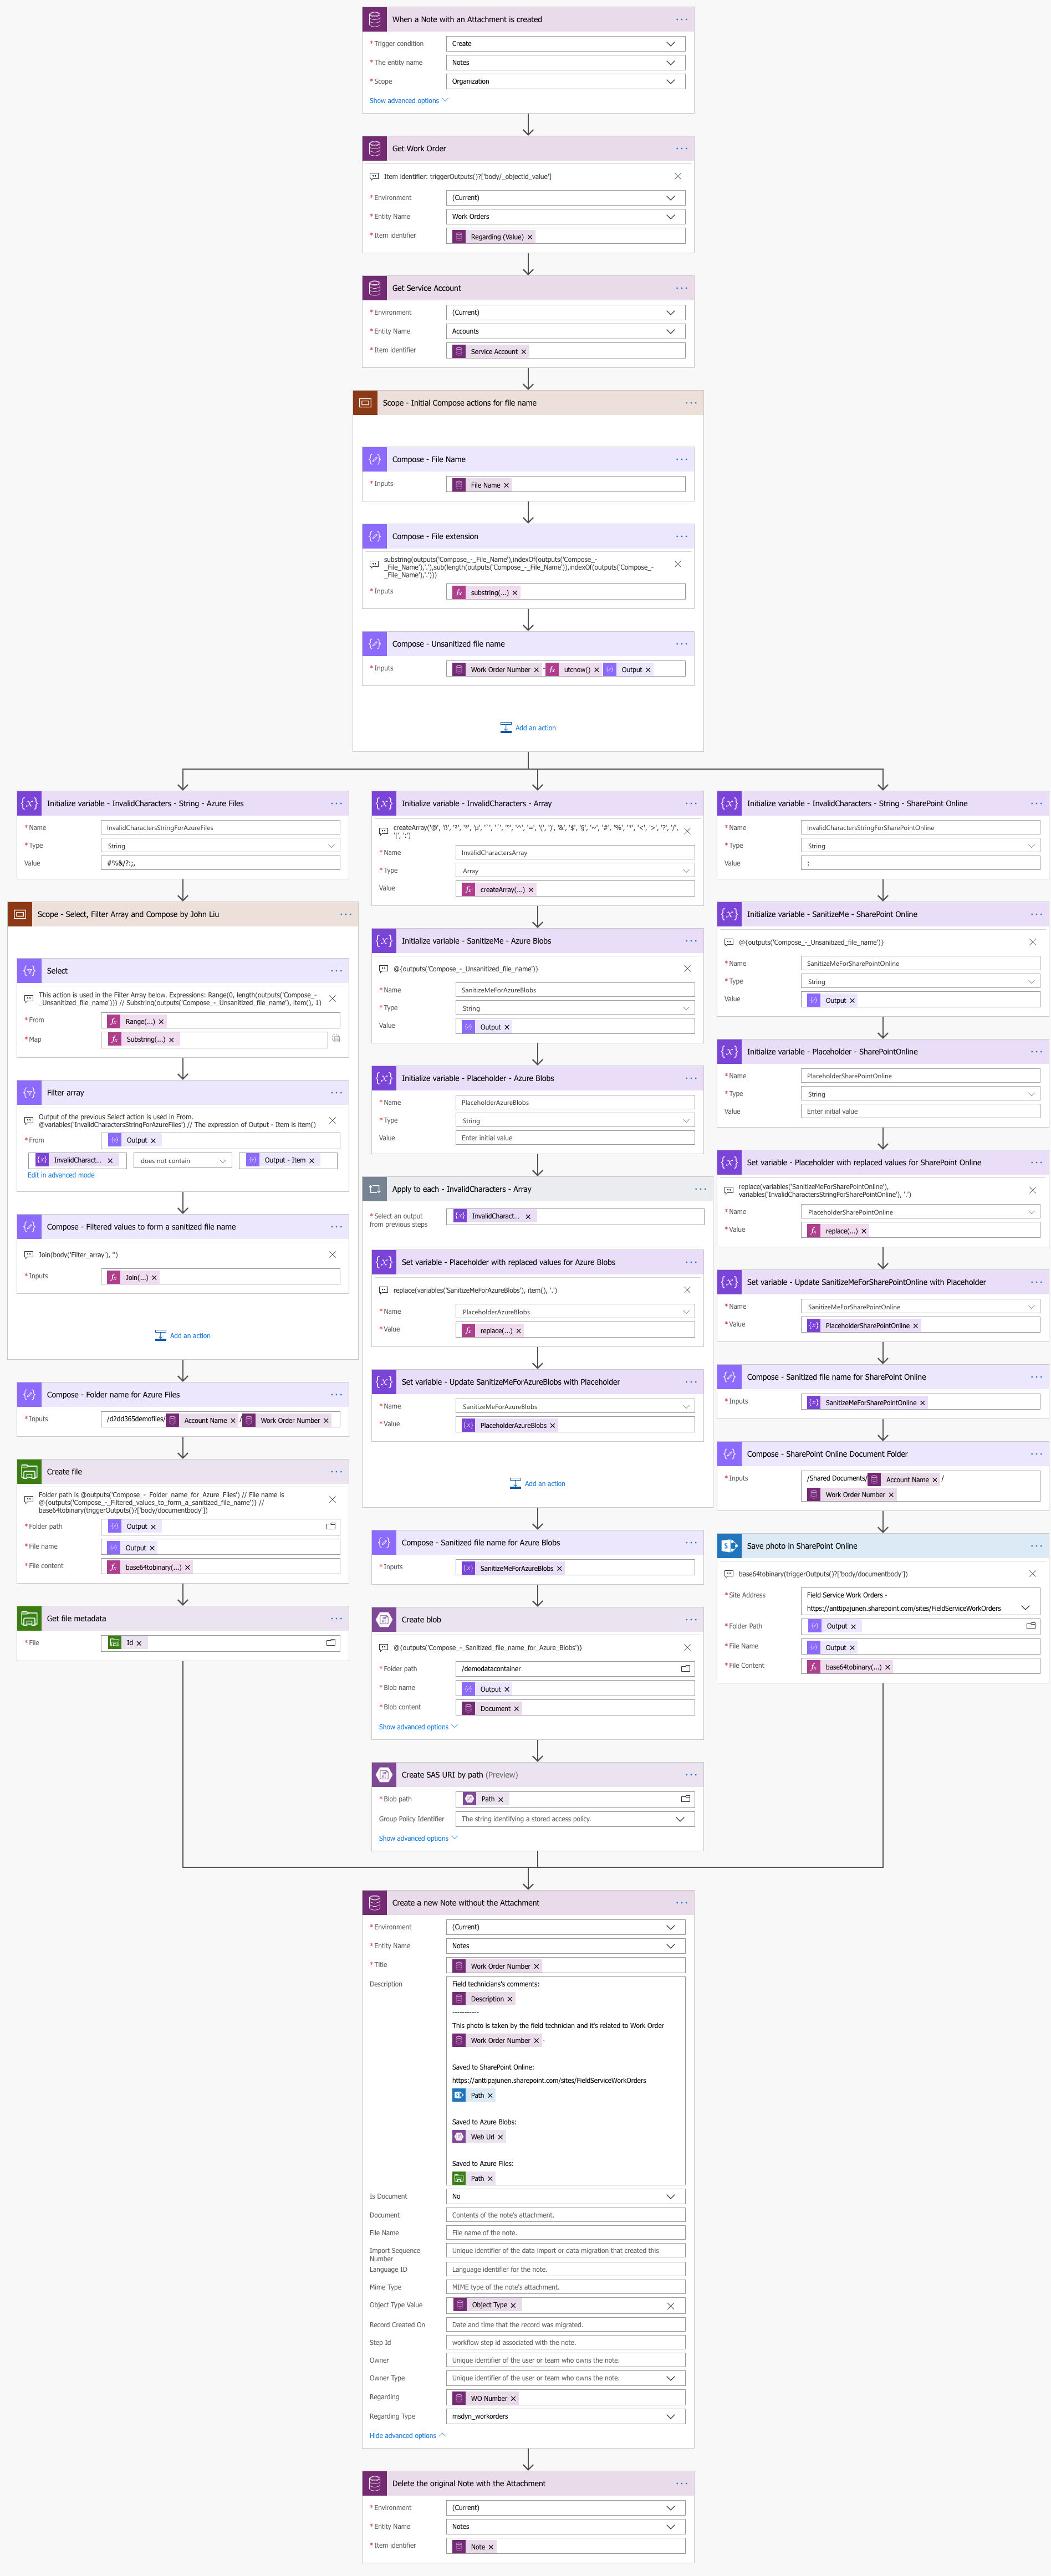
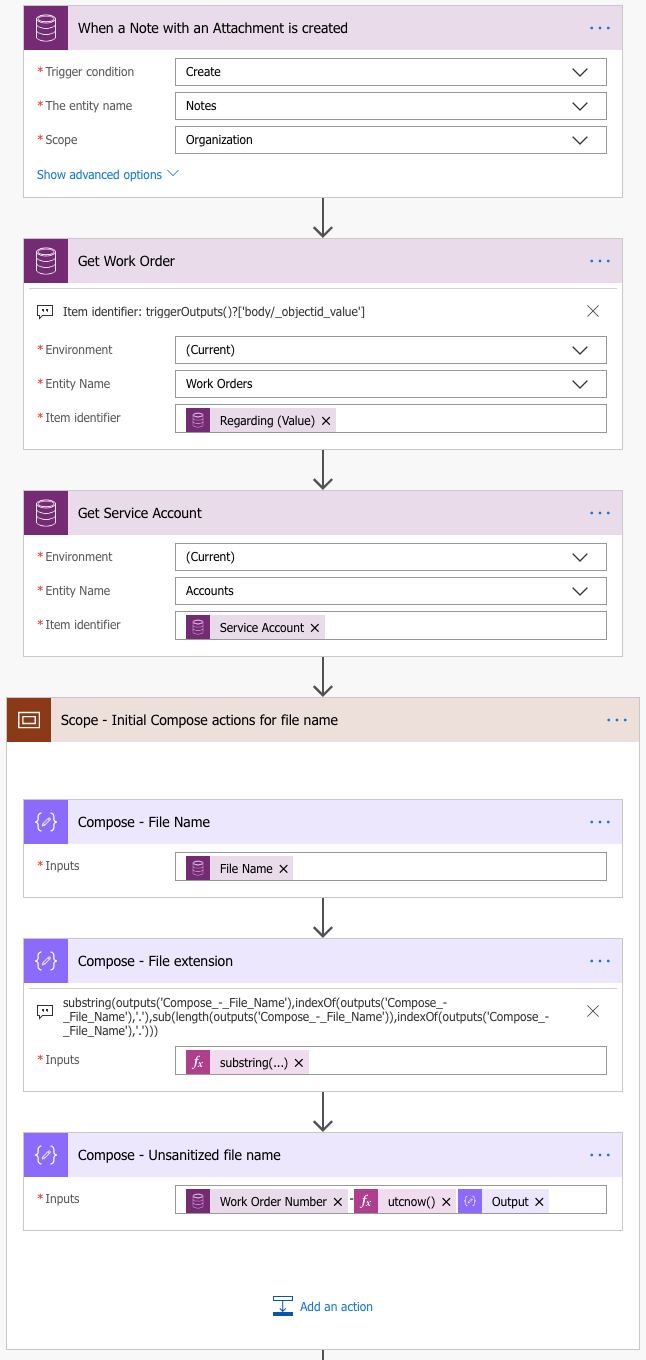
The beginning of the Flow
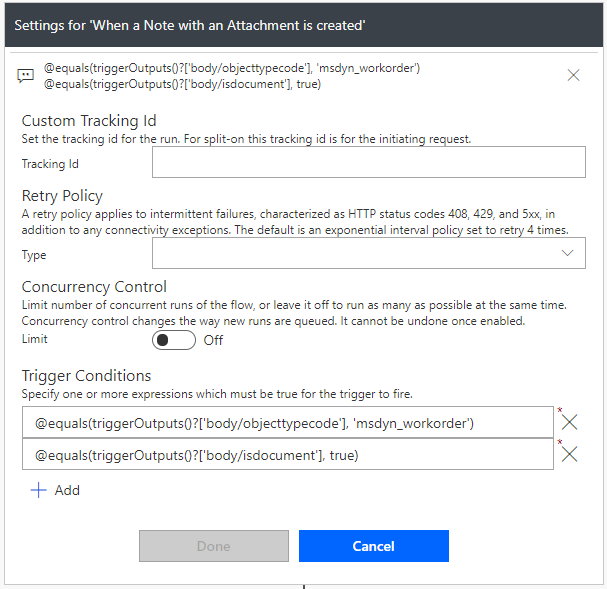
The initial actions are very similar to the ones in my previous blog post. Trigger Conditions are used to control that Flow only fires off when Object Type objecttypecode is msdyn_workorder and Is Document isdocument is true. A get action follows the trigger so that we can get to the Work Order related to the Note. Like in the previous post, a Service Account is used instead of a Billing Account. You can use whichever fits your need.
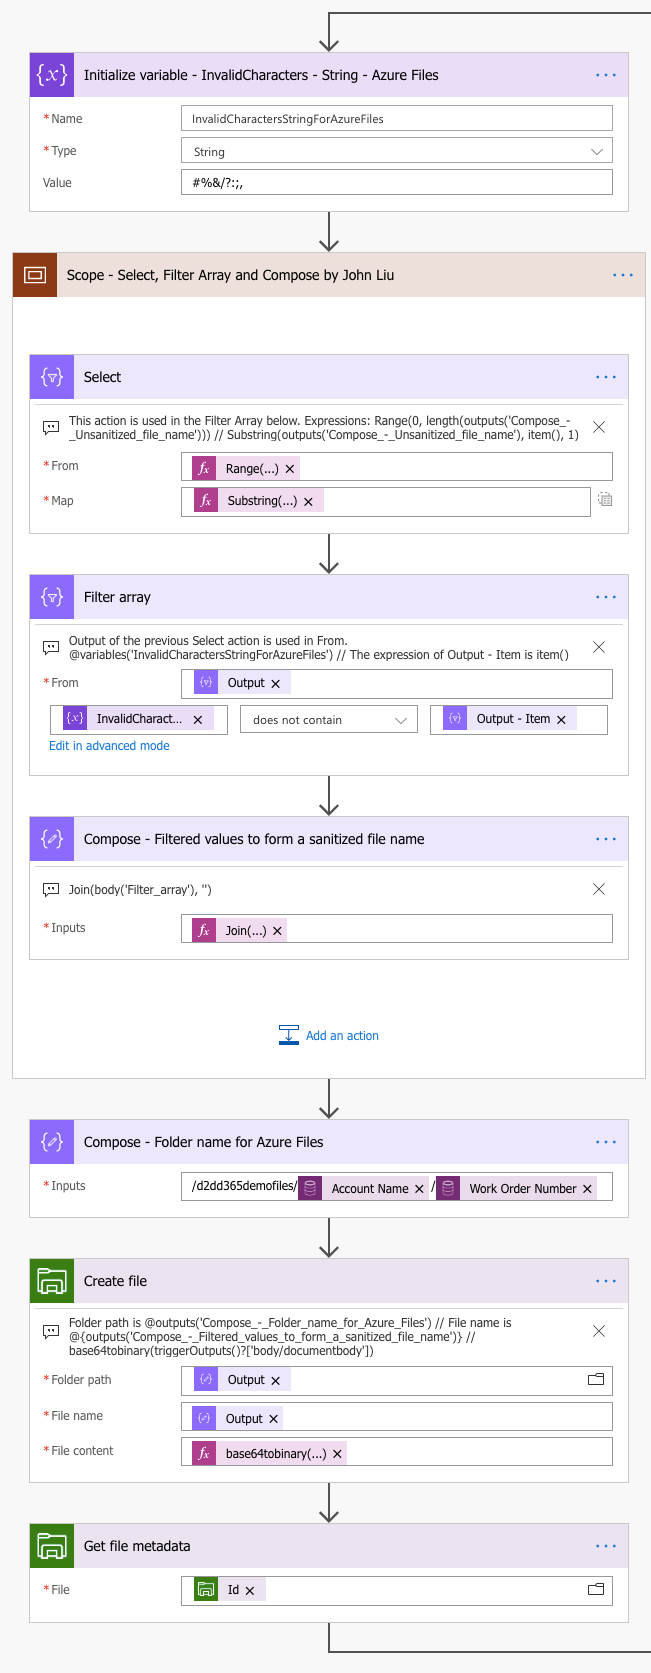
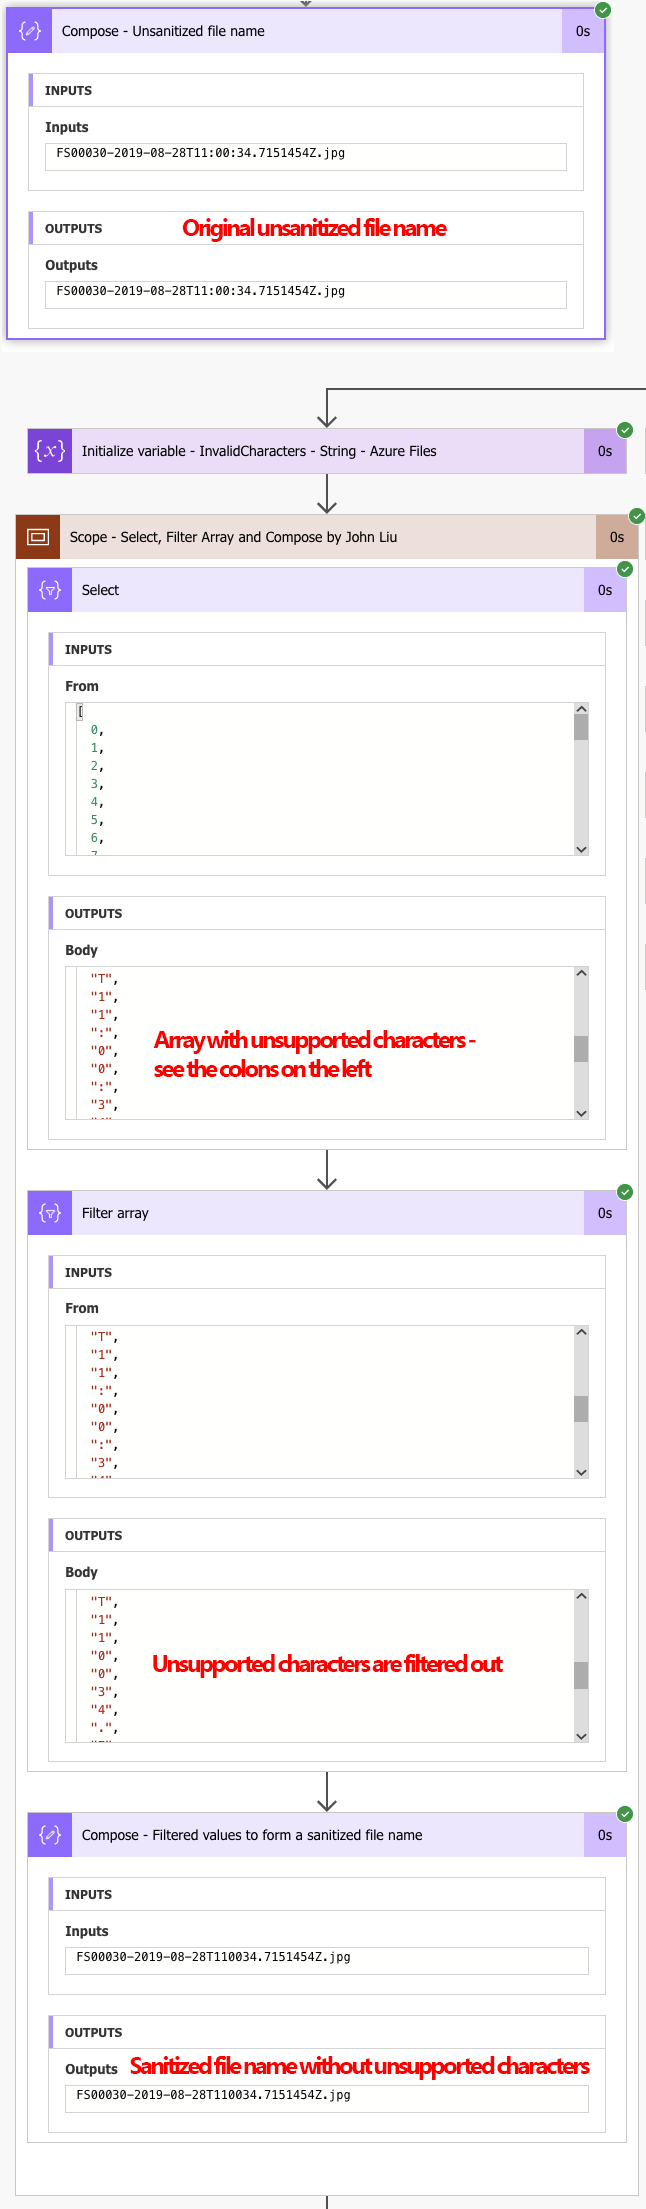
The scope is where things change a bit from the previous post. The first two compose actions are still used to get the file extension but the third compose forms an unsanitized file name for us. As utcNow() is used to create a timestamp to the file name, a problem occurs with Azure Files: Special characters like the colon ( : ) aren’t supported in file names in Azure Files. This means that special characters need to be sanitized i.e replaced with other supported characters. Before we explore the first approach to sanitizing special characters, huge kudos needs to be given to MVP John Liu for suggesting an approach he has tested in the past. If you don’t follow John, do so now. He is amazing with Flow!
Attachments to Azure Files
Attachments to Azure Files uses a Flow hack by John Liu. This is an efficient way to get the job done and the Flow runs swiftly when using this approach. The first thing to do is to define which characters are invalid. I have only included a handful of characters for this example. For a complete list of unsupported characters, read this page by Microsoft.
The scope is where the magic happens. The select action produces an array of characters from the unsanitized file name. The array is then filtered to weed out unwanted, unsupported characters. A join expression is then used to form a sanitized file name that is free on unsupported characters.
The final steps are to compose a folder for Azure Files, to create the file and to get its metadata so that the file path can be copied to the new Note record, which is created during the final steps of the Flow. To save the file, a base64ToBinary expressions needs to be used.
The image below shows the results when the Flow is run. The unsupported characters are weeded out.
Attachments to Azure Blobs
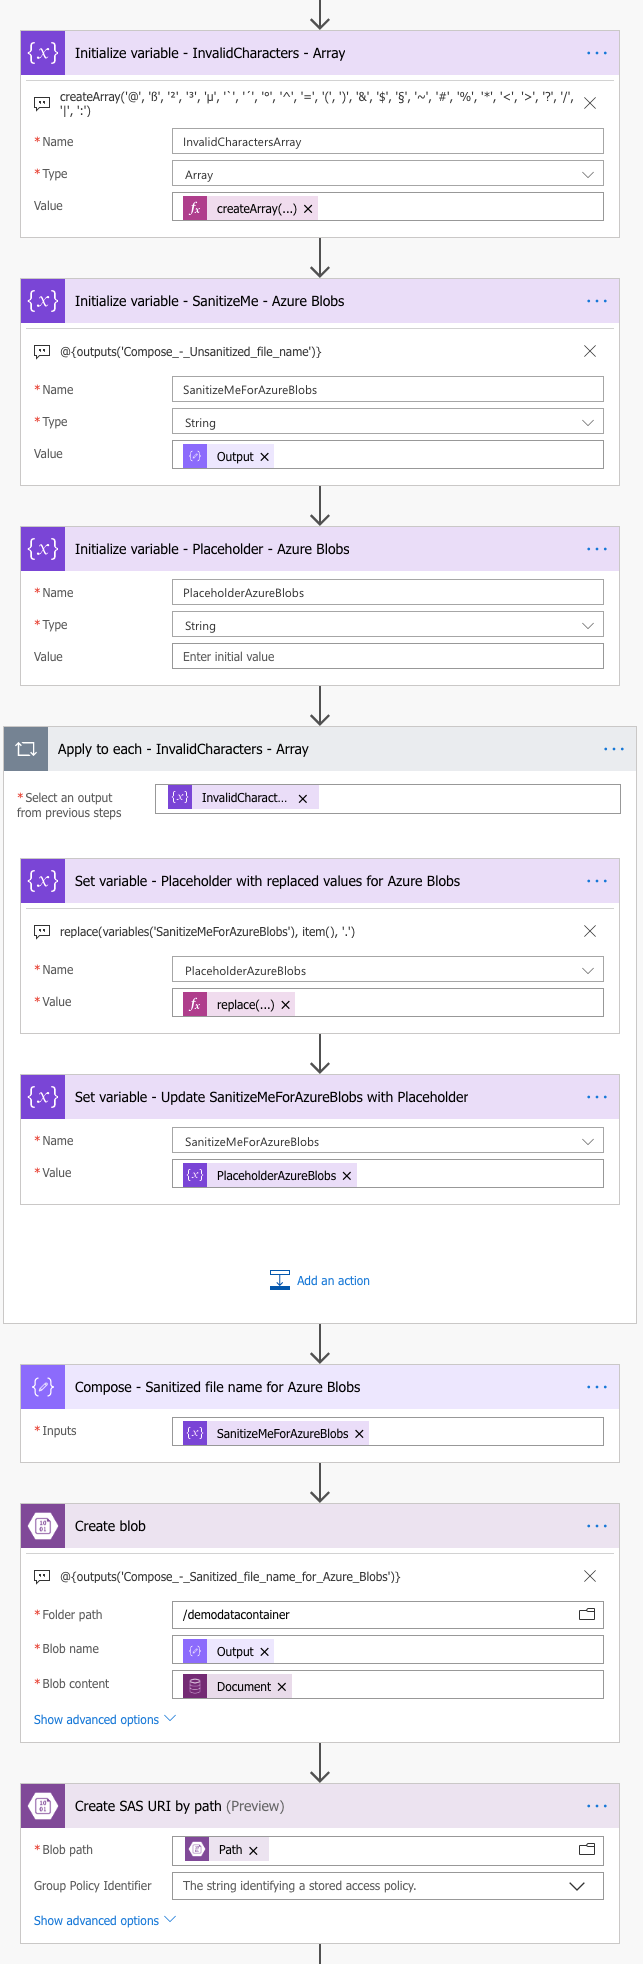
The approach for moving attachments to Azure Blobs is very different from the previous one. Remember that you can use any of the three approaches I’m covering for any of the three different storage options. The approach I’ve used for blobs is by AlanO365. Kudos to him for sharing his knowledge with the community! Let’s dissect the approach.
In the first action, a variable is initialized to create an array of invalid and unsupported characters. The next initialize variable action is for the unsanitized file name, which was composed in a previous action in the Flow. The third initialize variable is a placeholder that we will use inside the apply to each that is up next.
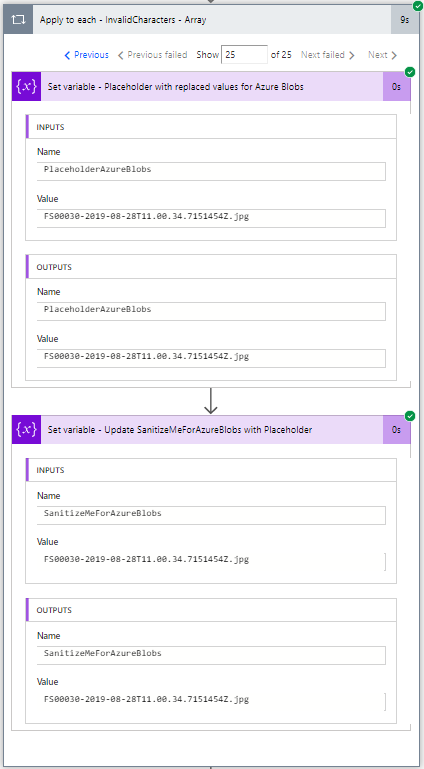
The apply to each action will loop through the array of invalid characters from a few actions back. In my tests, the loop took about 10 seconds. For this kind of Flow, that is perfectly fine: The Flow stores data so immediate results are really not needed. We can wait a few seconds. The first action in the apply to each is a set variable for the placeholder, to replace all invalid characters with a dot (.).
The second action in the apply to each will then update the initialized SanitizeMeForAzureBlobs with the value from the previously updated placeholder. The compose that is outside the apply to each will then be used to form a sanitized name, free of invalid characters.
The final steps are to create the file on Azure Blobs and to create a SAS URI (shared access signature) that will be copied to the new Note, created at the final steps of the Flow. Note that anyone with a SAS URI can access a file in blobs!
The image below shows the results from the apply to each. All colons are weeded out and replaced with dots.
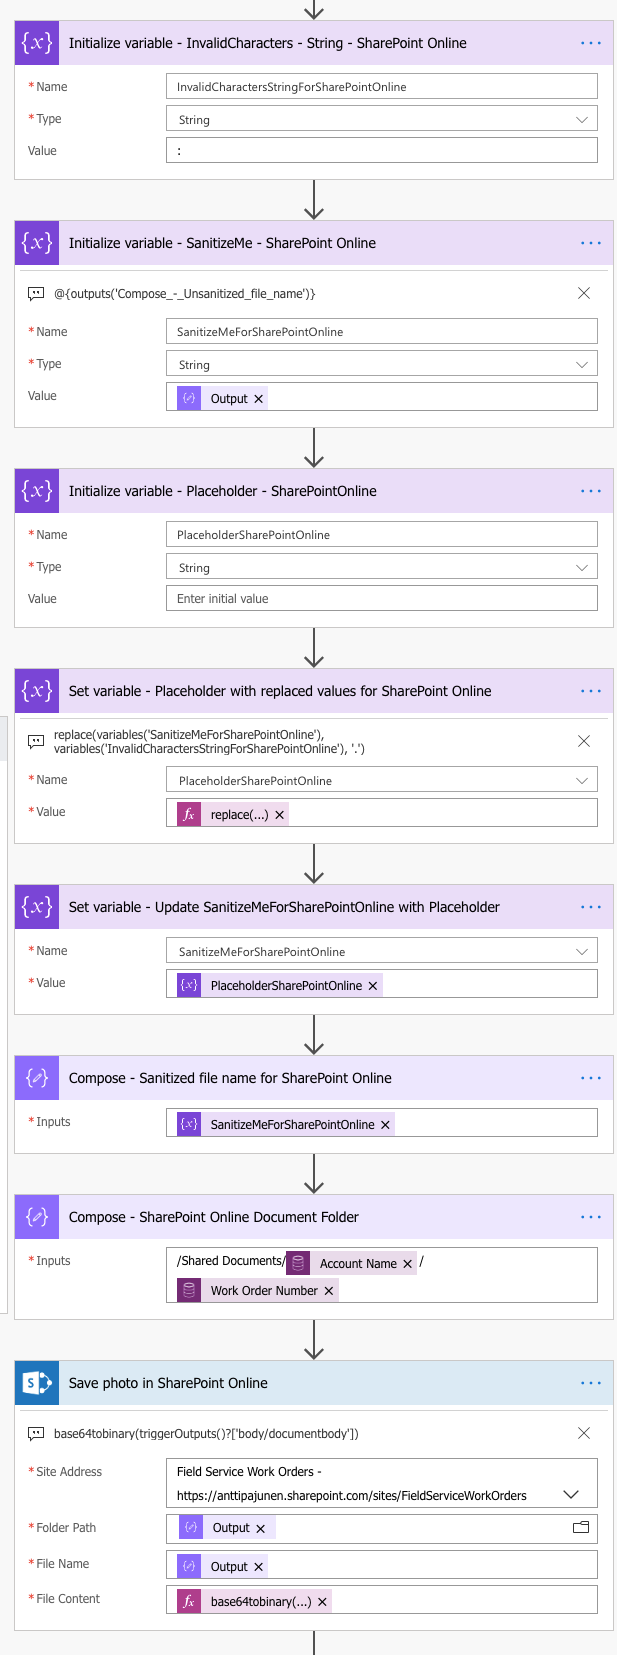
Attachments to SharePoint Online
The third approach to sanitizing invalid characters is an adaptation of the previous approach. Instead on creating an array of invalid characters, only a single illegal character is used. This way an apply to each loop is not needed and the Flow runs faster. For this use case of moving attachments that are images taken with Field Service Mobile, the only invalid character will be the colon ( : ). This approach is thus valid for that specific use case, but if there is even a slight chance of there being more than a single kind of invalid character, the first or second approach is better suited.
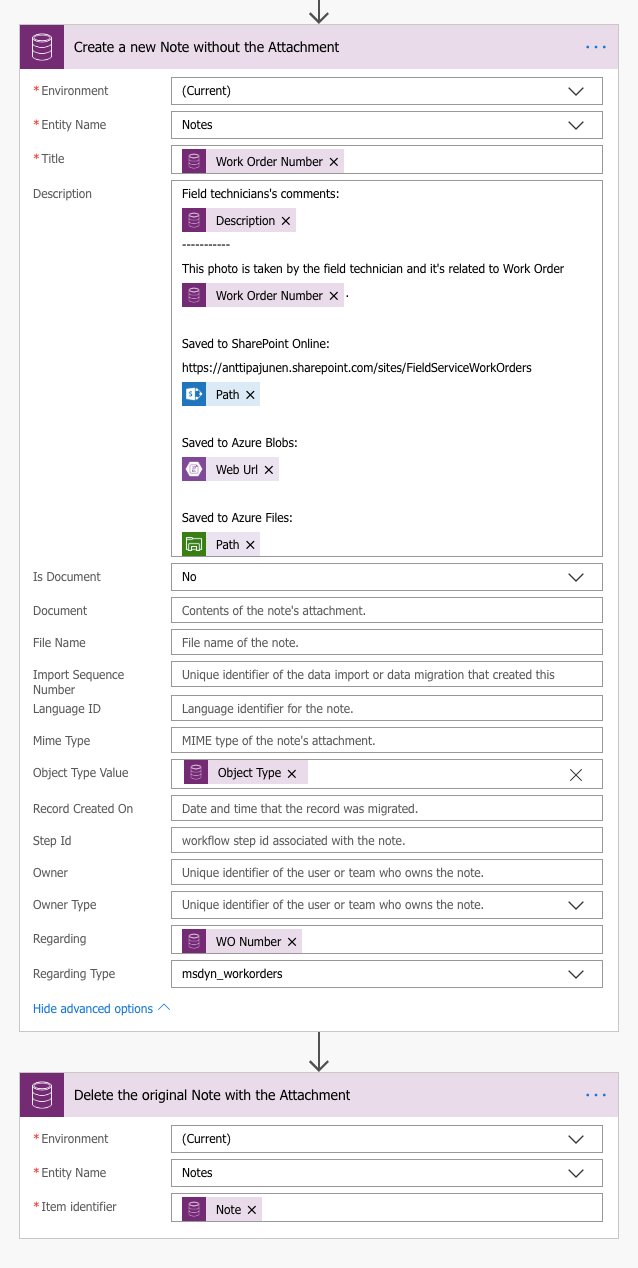
Create and delete Notes
The finals steps in the Flow are the same as in the previous post. The only changes here are the links to the different storage locations. To access files in Azure Files, a user should either use Azure Storage Explorer or have Azure Files usable from Windows.