Categorizing projects between parent and subprojects is a pretty frequent requirement that I hear in presales. While Project’s Office UI doesn’t support hierarchy visualizations (at least yet), Model-driven apps on CDS do. Visualizing hierarchical data has been around since Dynamics CRM 2015. It’s quite simple to set up and with the new Project, the process is less hassle (at least at the moment) than with Project Service Automation. This is because Project doesn’t have Project Templates that use a self-referential relationship but PSA does. If you want to dive deeper into the topic for PSA, be sure to read my article about project hierarchies in PSA.
Let’s get started with hierarchy visualizations.
1. Creating a self-referential relationship
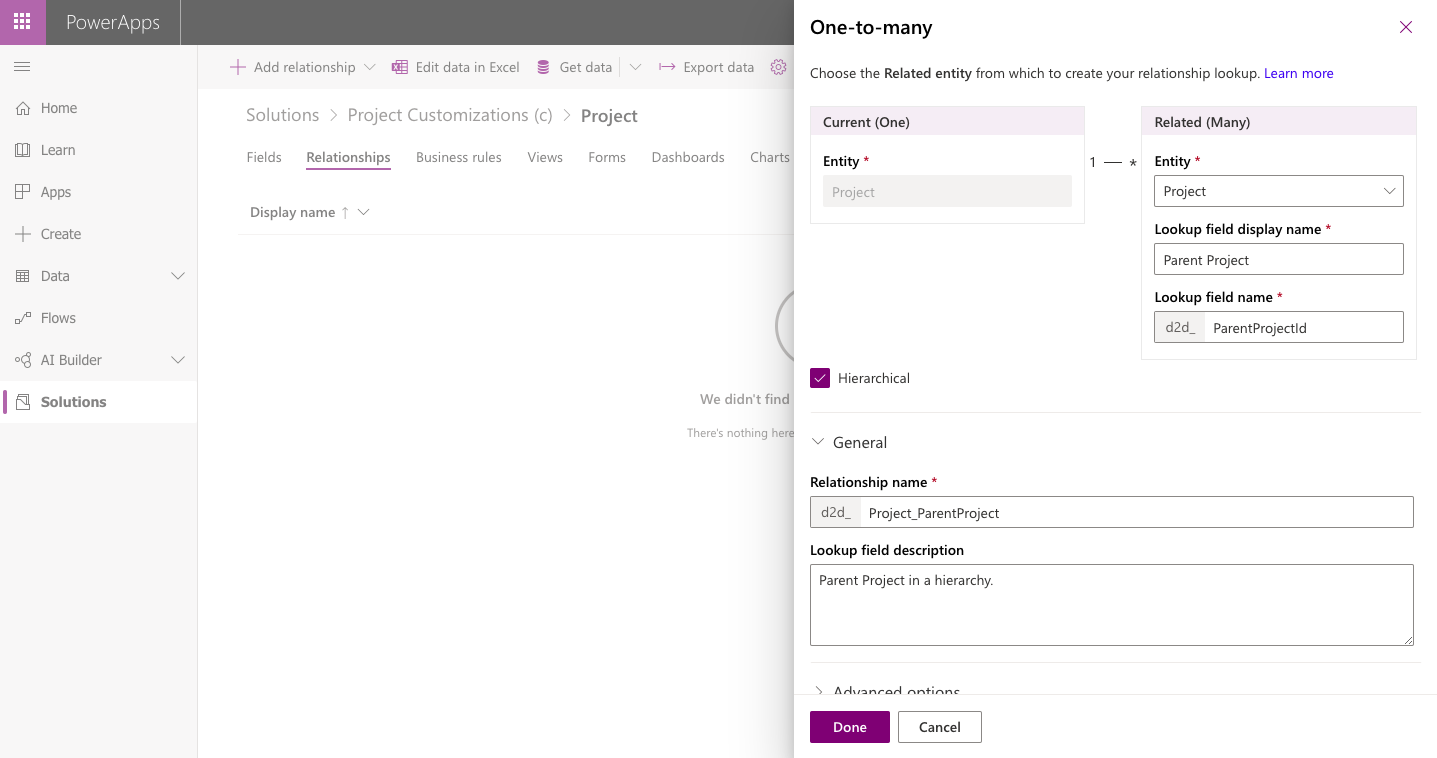
Creating a self-referential relationship is the first step in creating a hierarchy for projects. When creating a new relationship, remember to follow best practices: Customizations should end up in an unmanaged solution. A new 1:N relationship can be created by following the steps found below:
– Navigate to make.powerapps.com
– Choose Solutions
– Select your preferred unmanaged solution for customizations
– Add the Project entity to your solution / Navigate to the Project entity, if it is already in your solution
– Select + Add relationship on the ribbon
– Create a new 1:N relationship
Remember to set the relationship as Hierarchical.
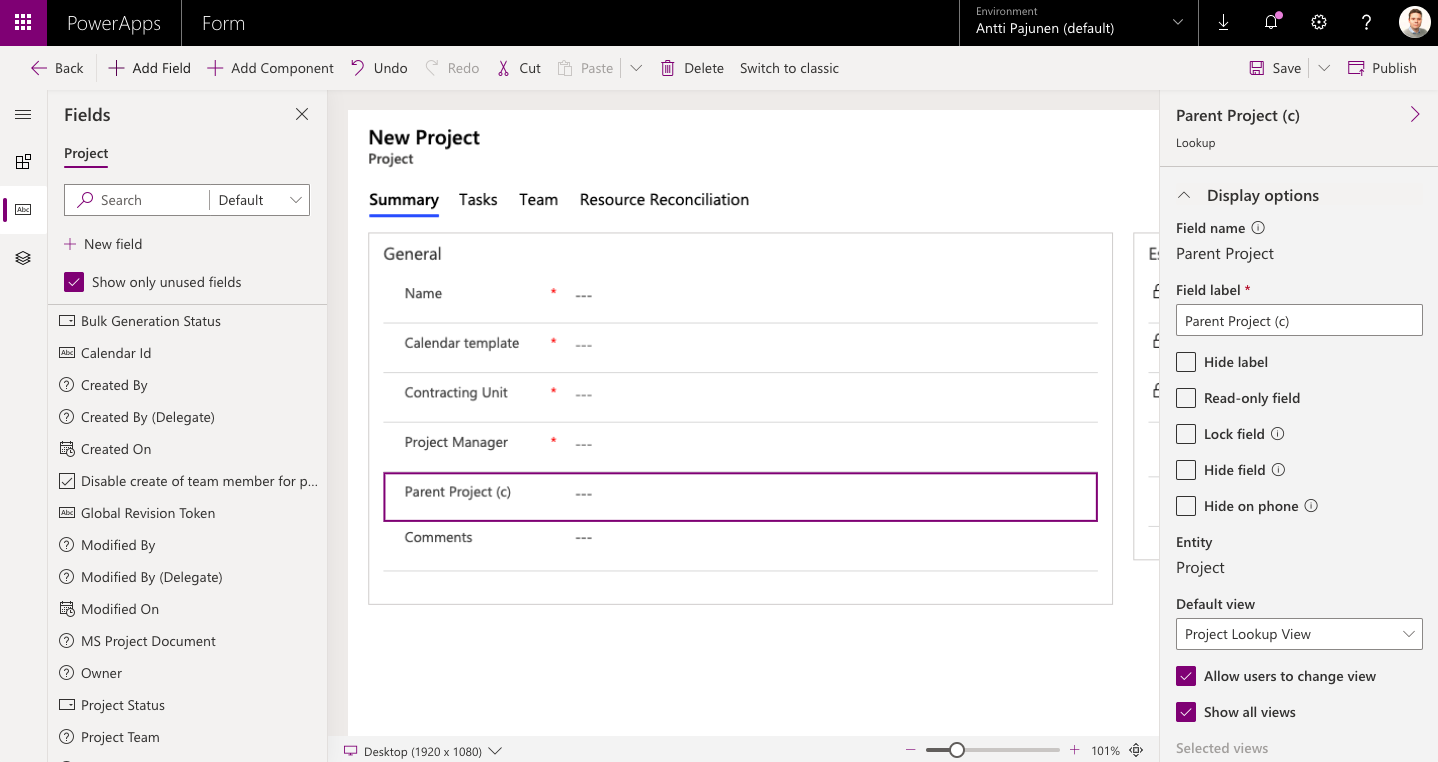
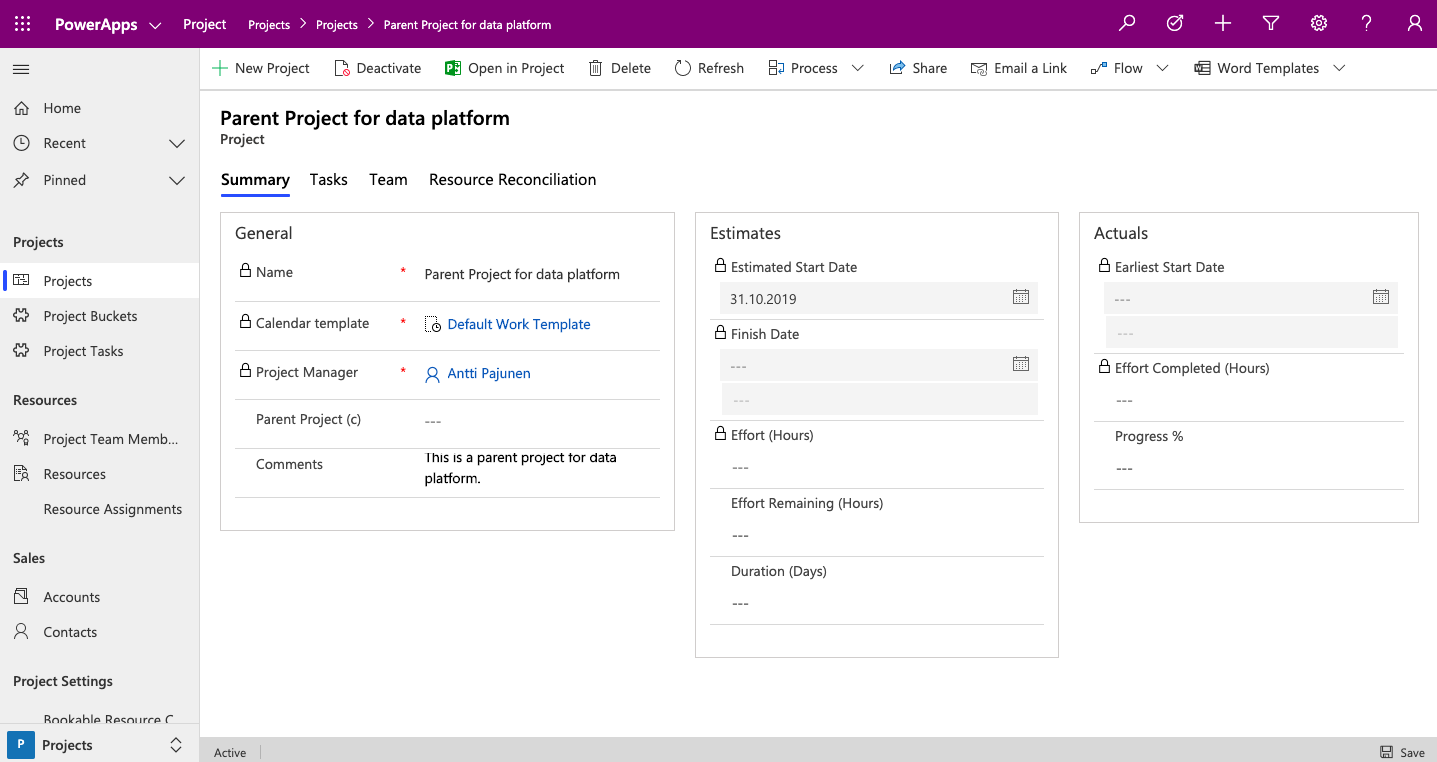
2. Add a lookup to Project on the Project entity’s main form
Step one results in a lookup field to Projects so the next thing to do is to add the lookup on the Project entity’s main form. The lookup is used to identify a project’s parent project.
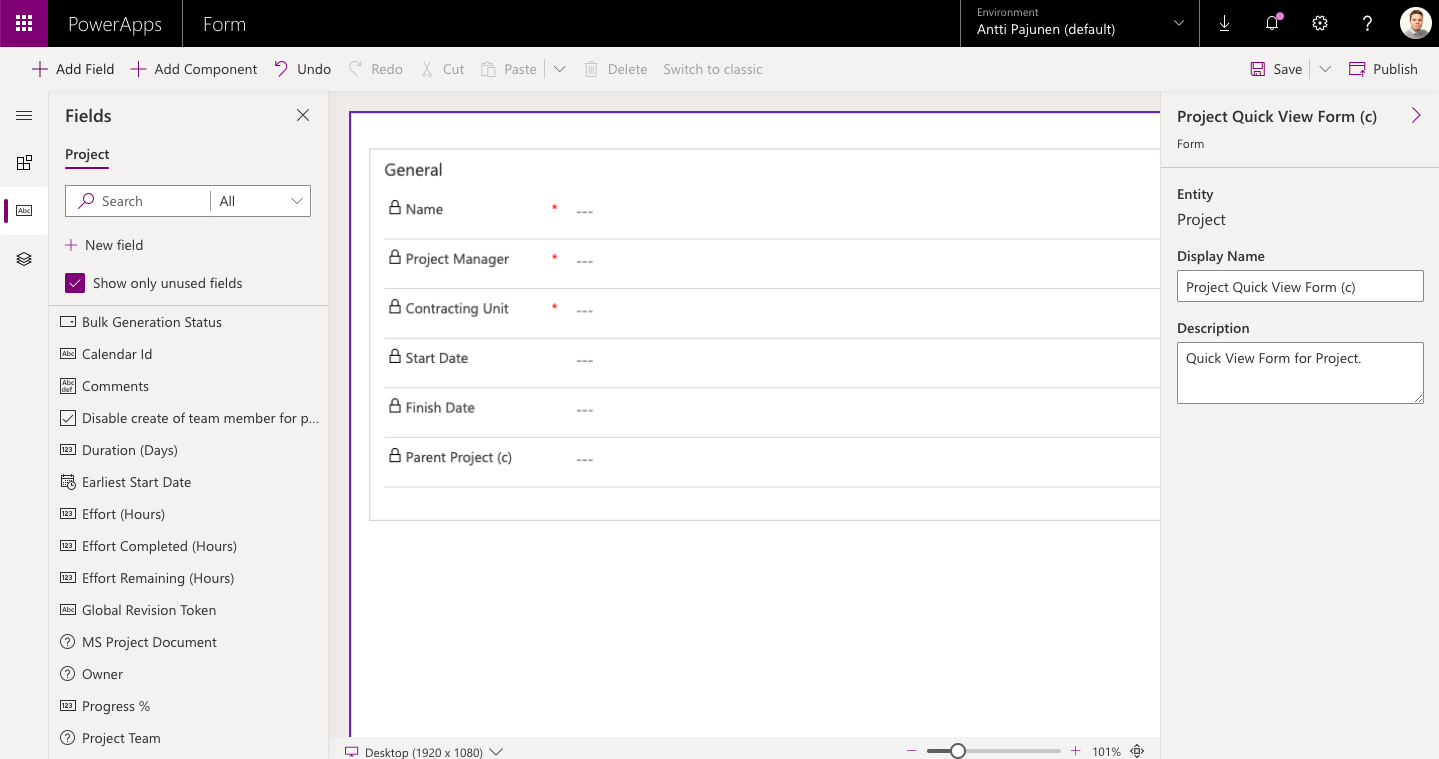
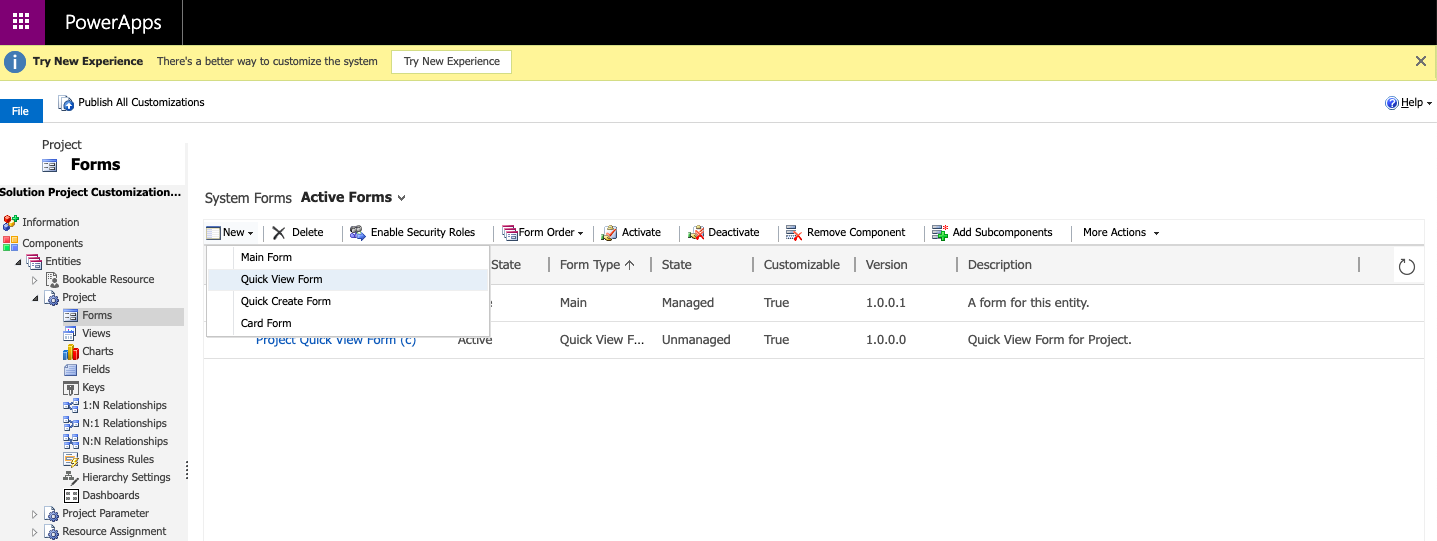
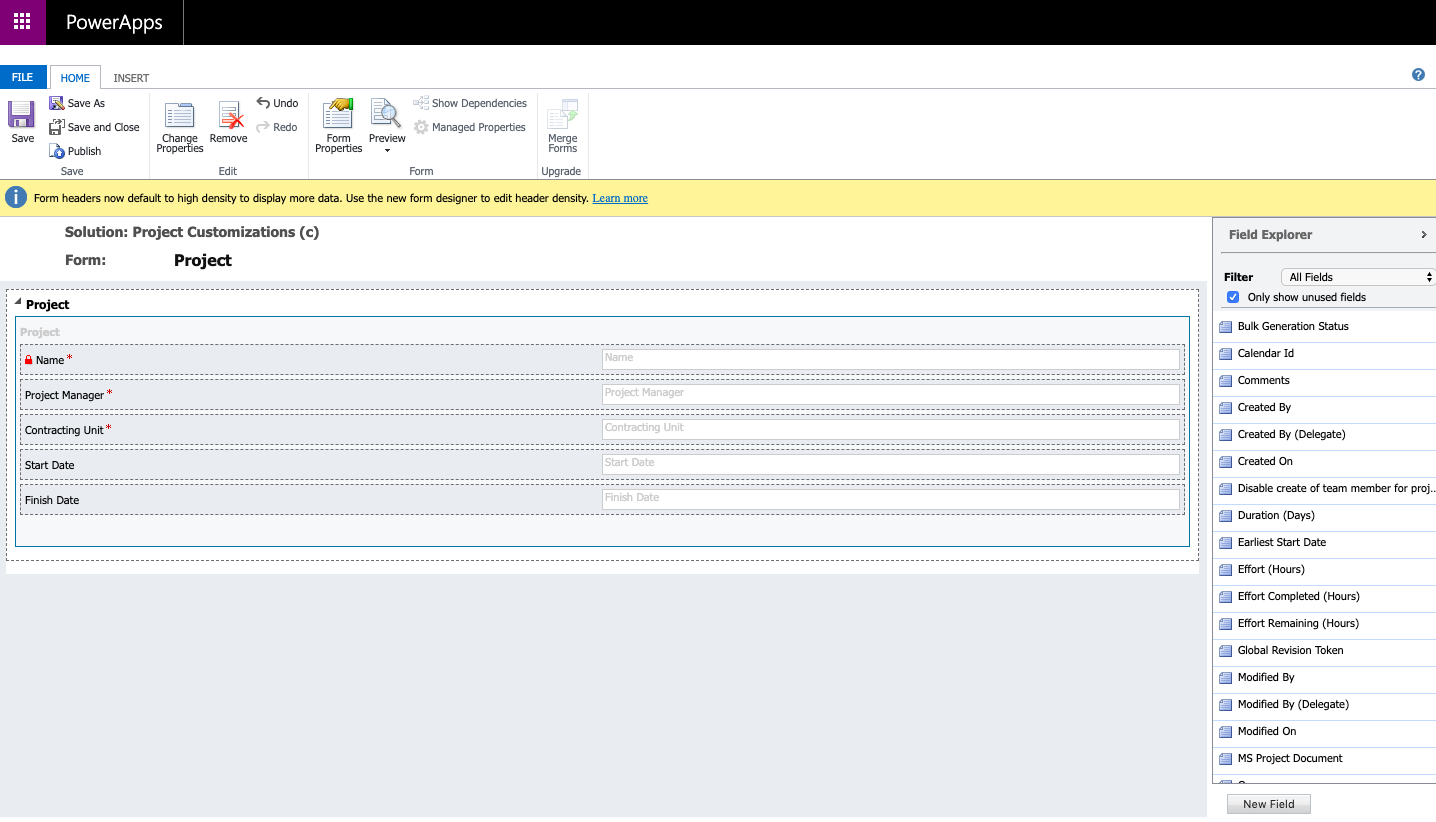
3. Create a Quick View Form
A Quick View Form is used in hierarchy visualizations. It’s possible to add multiple fields on a Quick View Form, however only the first four fields are displayed on a visualization tile. That’s at least what docs.microsoft.com states – see step 5 for what the end result actually looks like.
For some reason the new maker experience at make.powerapps.com didn’t let me save my Quick View Form so I had to create it on the classic experience. This may have been an isolated glitch but if you happen to experience the same, be sure to leave a word in the comments.
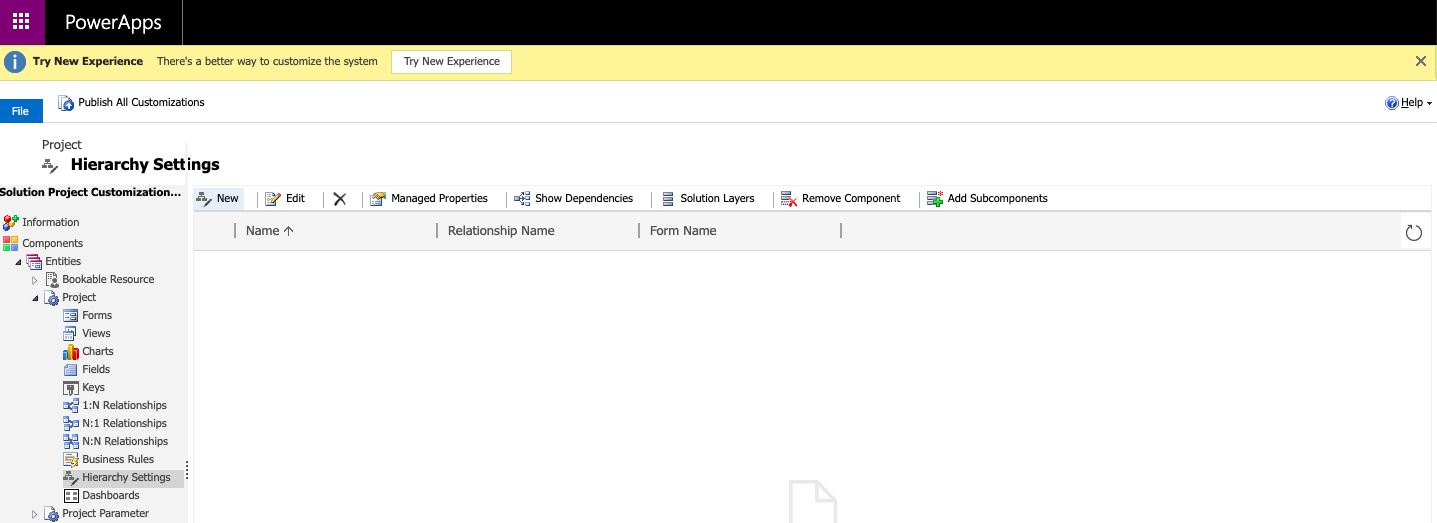
4. Create a new Hierarchy Setting
Next step is to create a Hierarchy Settings. At the time of writing this post, Hierarchy Settings can only be created on the classic experience. Choose the Quick View Form created in step 3 as the default form, when creating a new setting.
5. Test the project hierarchy customizations
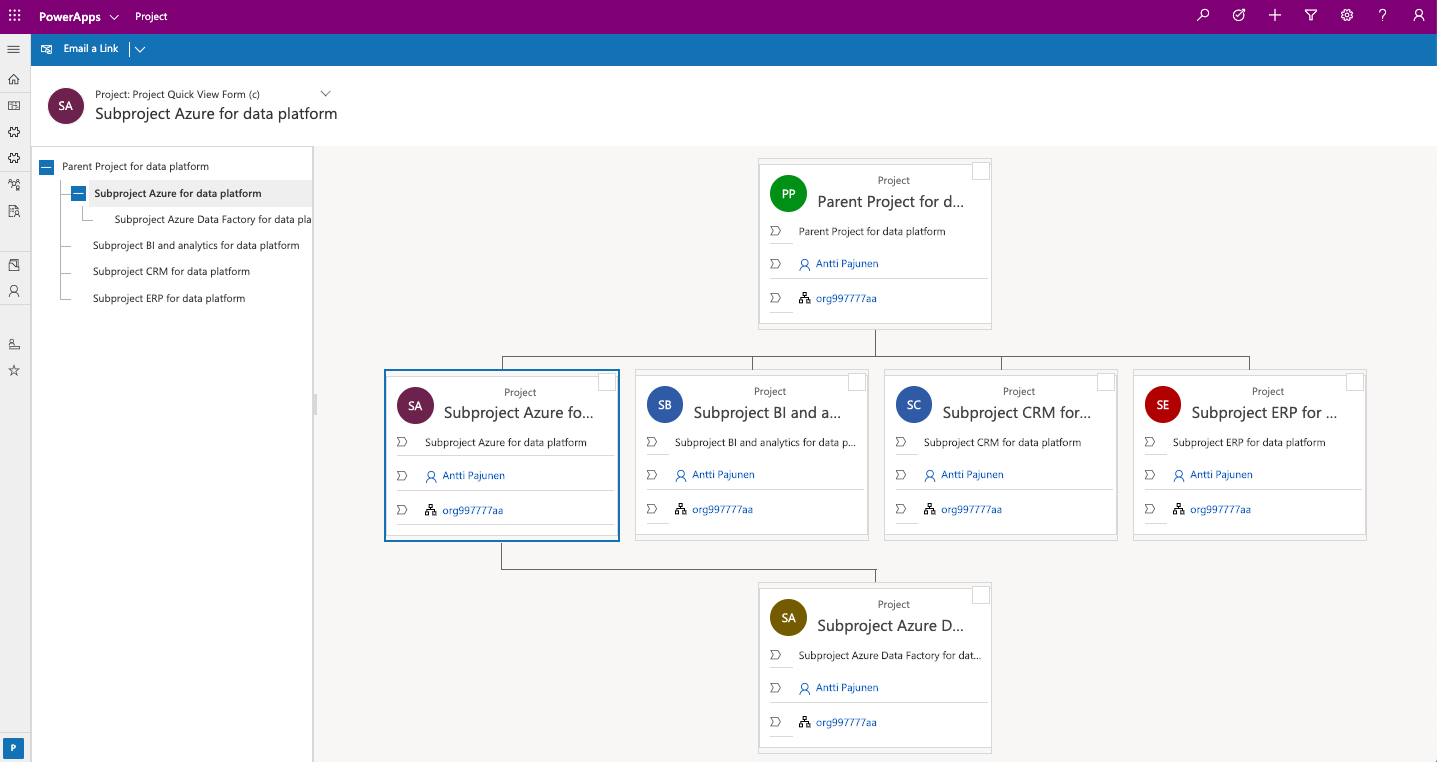
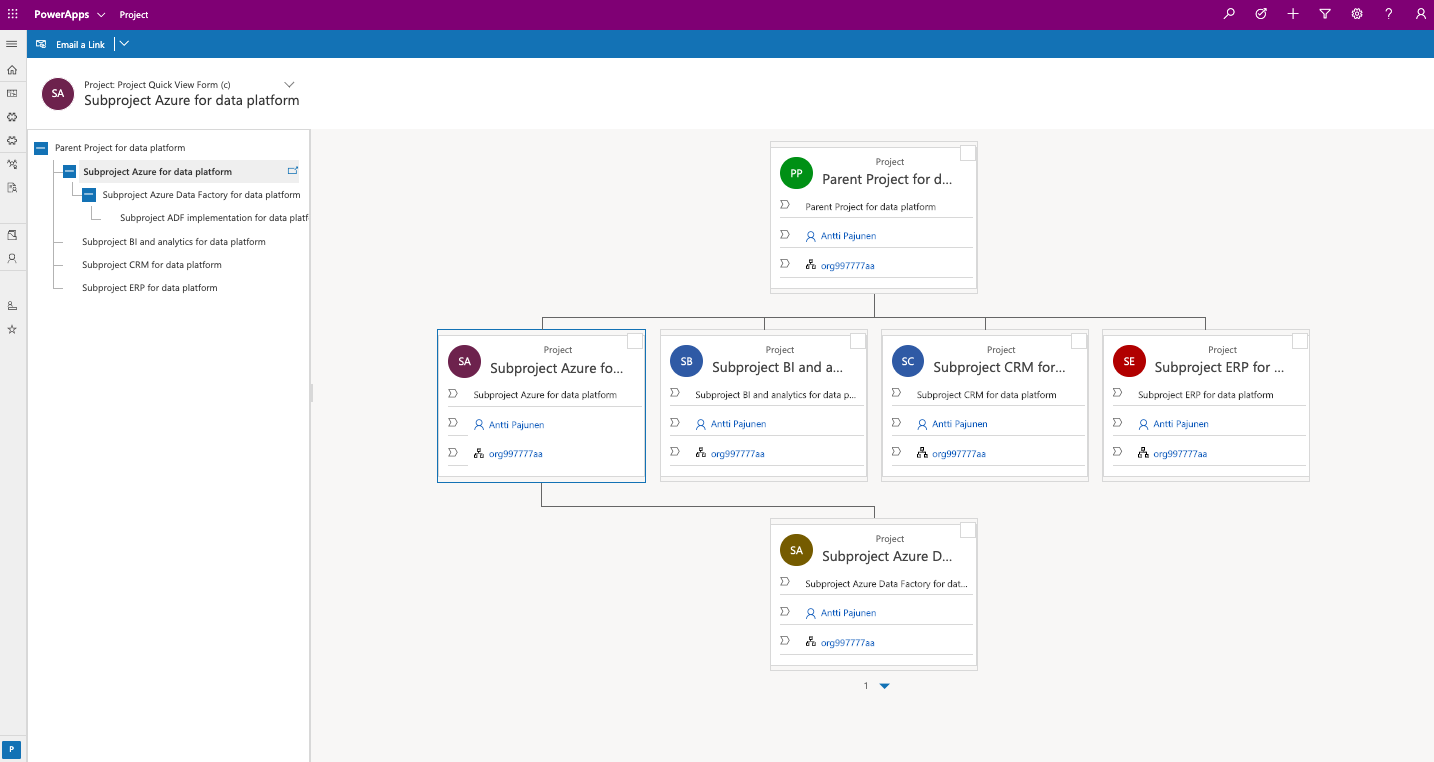
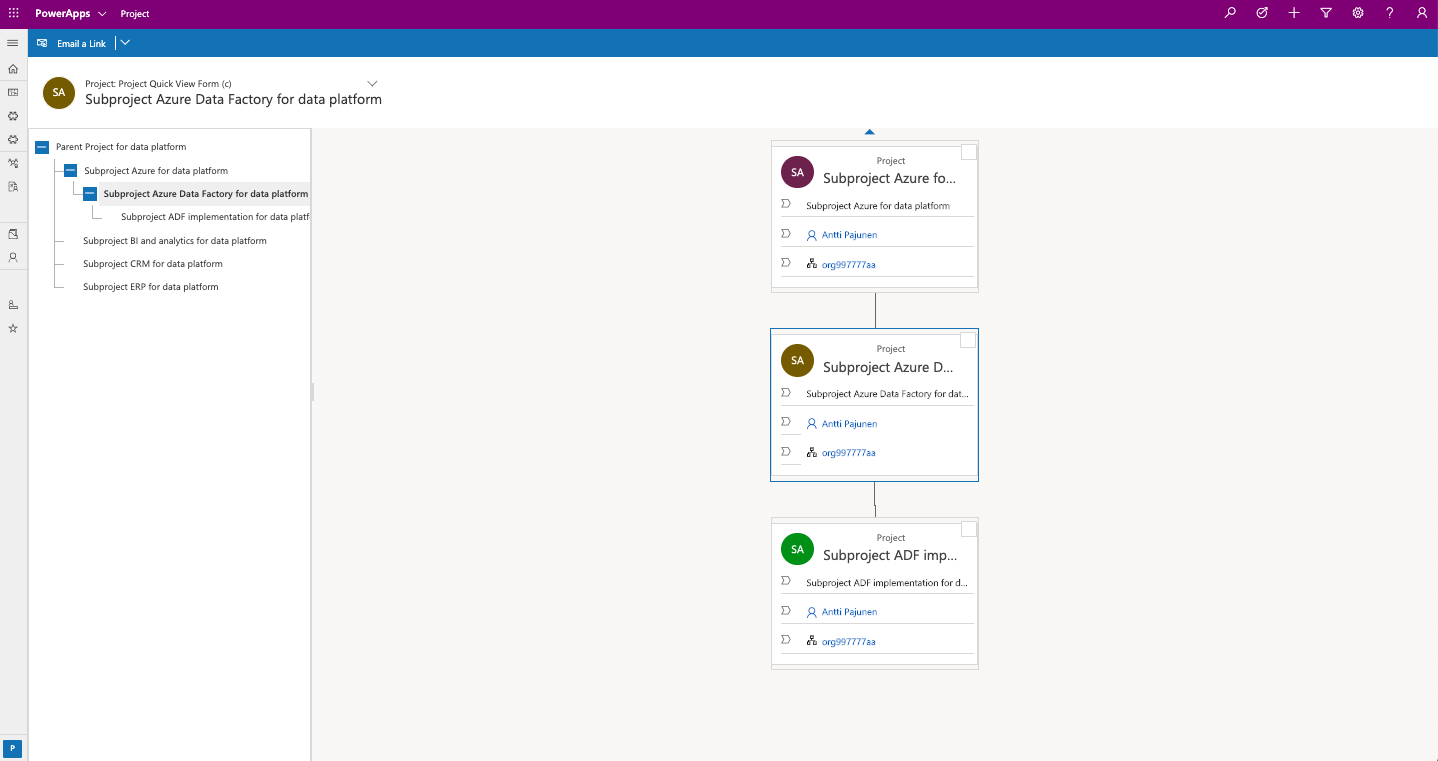
Create a new parent project, on which the lookup created in step 1 will be left empty. At least one other project will be needed. That will be a subproject, on which the lookup will point to the newly created parent project. In this example, I have created multiple subprojects and pointed them to different parent projects, to illustrate what a 4-level hierarchy will look like.
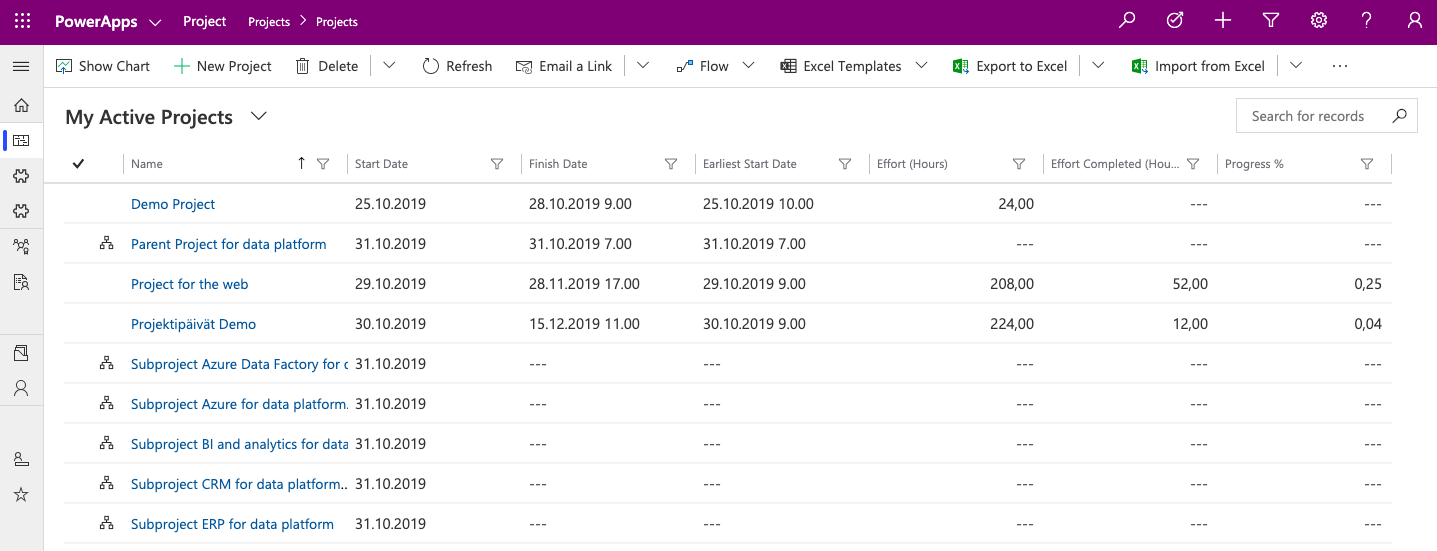
When a parent and all necessary subprojects have been created, each record in a hierarchy will show a hierarchy icon next to it.
The photos below show what a hierarchy visualization looks like. It would seem that a visualization tile only shows the first 3 fields, despite docs.microsoft.com stating that the first 4 fields will be displayed. If you’re getting different results or figure out a way to get the first 4 fields visible, be sure to leave a word in the comments.

